💡
AppMare is the ultimate all-in-one app builder for beginners, small businesses, and developers. Whether you’re new to app creation or a developer looking to take your project further, AppMare makes it simple to design and publish high-quality apps. Code once and deploy across Mobile, Windows, macOS, Linux, and the Web—all from a single platform.
AppMare: Build Apps for All Platforms with Ease!
No coding experience? No problem! AppMare offers an intuitive interface with easy-to-use tools that make app creation accessible to everyone. Developers can go deeper with advanced features, supporting .NET MAUI and Uno Platform for seamless cross-platform projects.
Key Features:
- Cross-Platform Development: Build apps for Mobile, macOS, Windows, Linux, and the Web from a single project.
- User-Friendly Interface: Quickly develop apps using accessible tools, ideal for beginners and small businesses.
- Export to .NET MAUI & Uno Platform: Developers can export their projects into .NET MAUI and Uno Platform, enabling more advanced customization.
- All-in-One Solution: Access comprehensive tools, including code editors, cloud services, and in-app testing across devices.
- Instant Publishing: Directly publish your apps to major app distribution platforms with a few clicks.
Why Choose AppMare?
- Perfect for Beginners: No coding skills required—anyone can create professional apps with accessible tools.
- Small Business Friendly: Quickly create branded apps to engage customers and grow your business.
- Developers’ Best Friend: Save time with code reusability and cross-platform support, easily integrating with .NET MAUI and Uno Platform.
Subscription Information:
Subscriptions are available to give you full access to AppMare’s powerful tools and features. Your subscription will be charged to your iTunes account at the end of the trial if eligible. Auto-renewal is enabled unless you cancel 24 hours before the end of the current period. Manage your subscription anytime through your iTunes account settings. Note: Any unused portion of a free trial will be forfeited upon purchasing a subscription.
Get Started with AppMare Today
Start building your app today with AppMare—download now and get a free trial!
💡
AppMare is designed to make app development accessible and efficient. Whether you're an absolute beginner or an experienced developer, AppMare offers tools that meet your needs and simplify the process of creating cross-platform applications.
Why Choose AppMare?
Here’s why you should consider using AppMare to create your apps:
1. Cross-Platform Development
AppMare allows you to build apps that work on Mobile, macOS, Windows, Linux, and the Web—all from a single project. This reduces the need for multiple codebases and lets you deploy your app on various platforms with ease.
2. User-Friendly Interface
No coding experience? No problem! AppMare’s intuitive drag-and-drop interface lets you create stunning apps with ease. Even if you’re new to app development, AppMare simplifies the entire process.
3. Powerful Tools for Developers
For developers who need advanced features, AppMare supports .NET MAUI and Uno Platform for cross-platform projects. You can export your apps to these platforms for further customization, offering a great deal of flexibility and power.
4. All-in-One Solution
AppMare provides everything you need in one platform: code editors, cloud services, device testing, and more. You don’t need to worry about integrating different tools. Everything is built into AppMare, making app creation seamless and fast.
5. Instant Publishing
Once your app is ready, you can instantly publish it to popular app distribution platforms like the App Store, Google Play, and more. Just a few clicks, and your app is live!
6. Perfect for Small Businesses and Entrepreneurs
With AppMare, small businesses and entrepreneurs can easily create their own branded mobile apps. Engage your customers, improve your services, and grow your business without the need for expensive developers.
Get Started Today
Start building your app today with AppMare and see how easy it is to bring your ideas to life. Whether you're looking to build your first app or deploy a complex cross-platform project, AppMare has got you covered.
Installation
Content for Installation section.
Setup
Content for Setup section.
Publish to Android
Content for Publish to Android section.
Publish as AAB and APK
1. Publish
Select this option to publish your application to the desired platform.

2. Android
Choose Android to prepare your application for the Android platform.

3. APK & AAB
Generate APK and AAB files to deploy your application to the Android Play Store or other distribution methods.

4. .NET MAUI vs Uno Platform
By default, the publishing framework is set to .NET MAUI. If needed, you can switch to Uno Platform.

.NET MAUI (Multi-platform App UI):
- Supports iOS, Android, macOS, and Windows.
- Uses C# and XAML for shared business logic and UI components.
- Ideal for developers looking for Microsoft's cross-platform solution.
- Learn more at the official documentation: .NET MAUI Documentation.
Uno Platform:
- Runs on Windows, iOS, Android, macOS, WebAssembly, and Linux.
- Leverages the Universal Windows Platform (UWP) model.
- Great for bringing modern UWP apps to other platforms.
- Learn more at the official documentation: Uno Platform Documentation.
Publish To Playstore
1. Creating an app on Google Play Store
Follow the steps below to create an app on Google Play Store:
- Open the Google Play Console.
- Click on the Create app button at the top right side of your screen.
- Enter the App name, select the app type, and choose whether the app is Free or Paid.
- Accept the Declarations.
- Click Create app at the bottom.
2. Set up your app
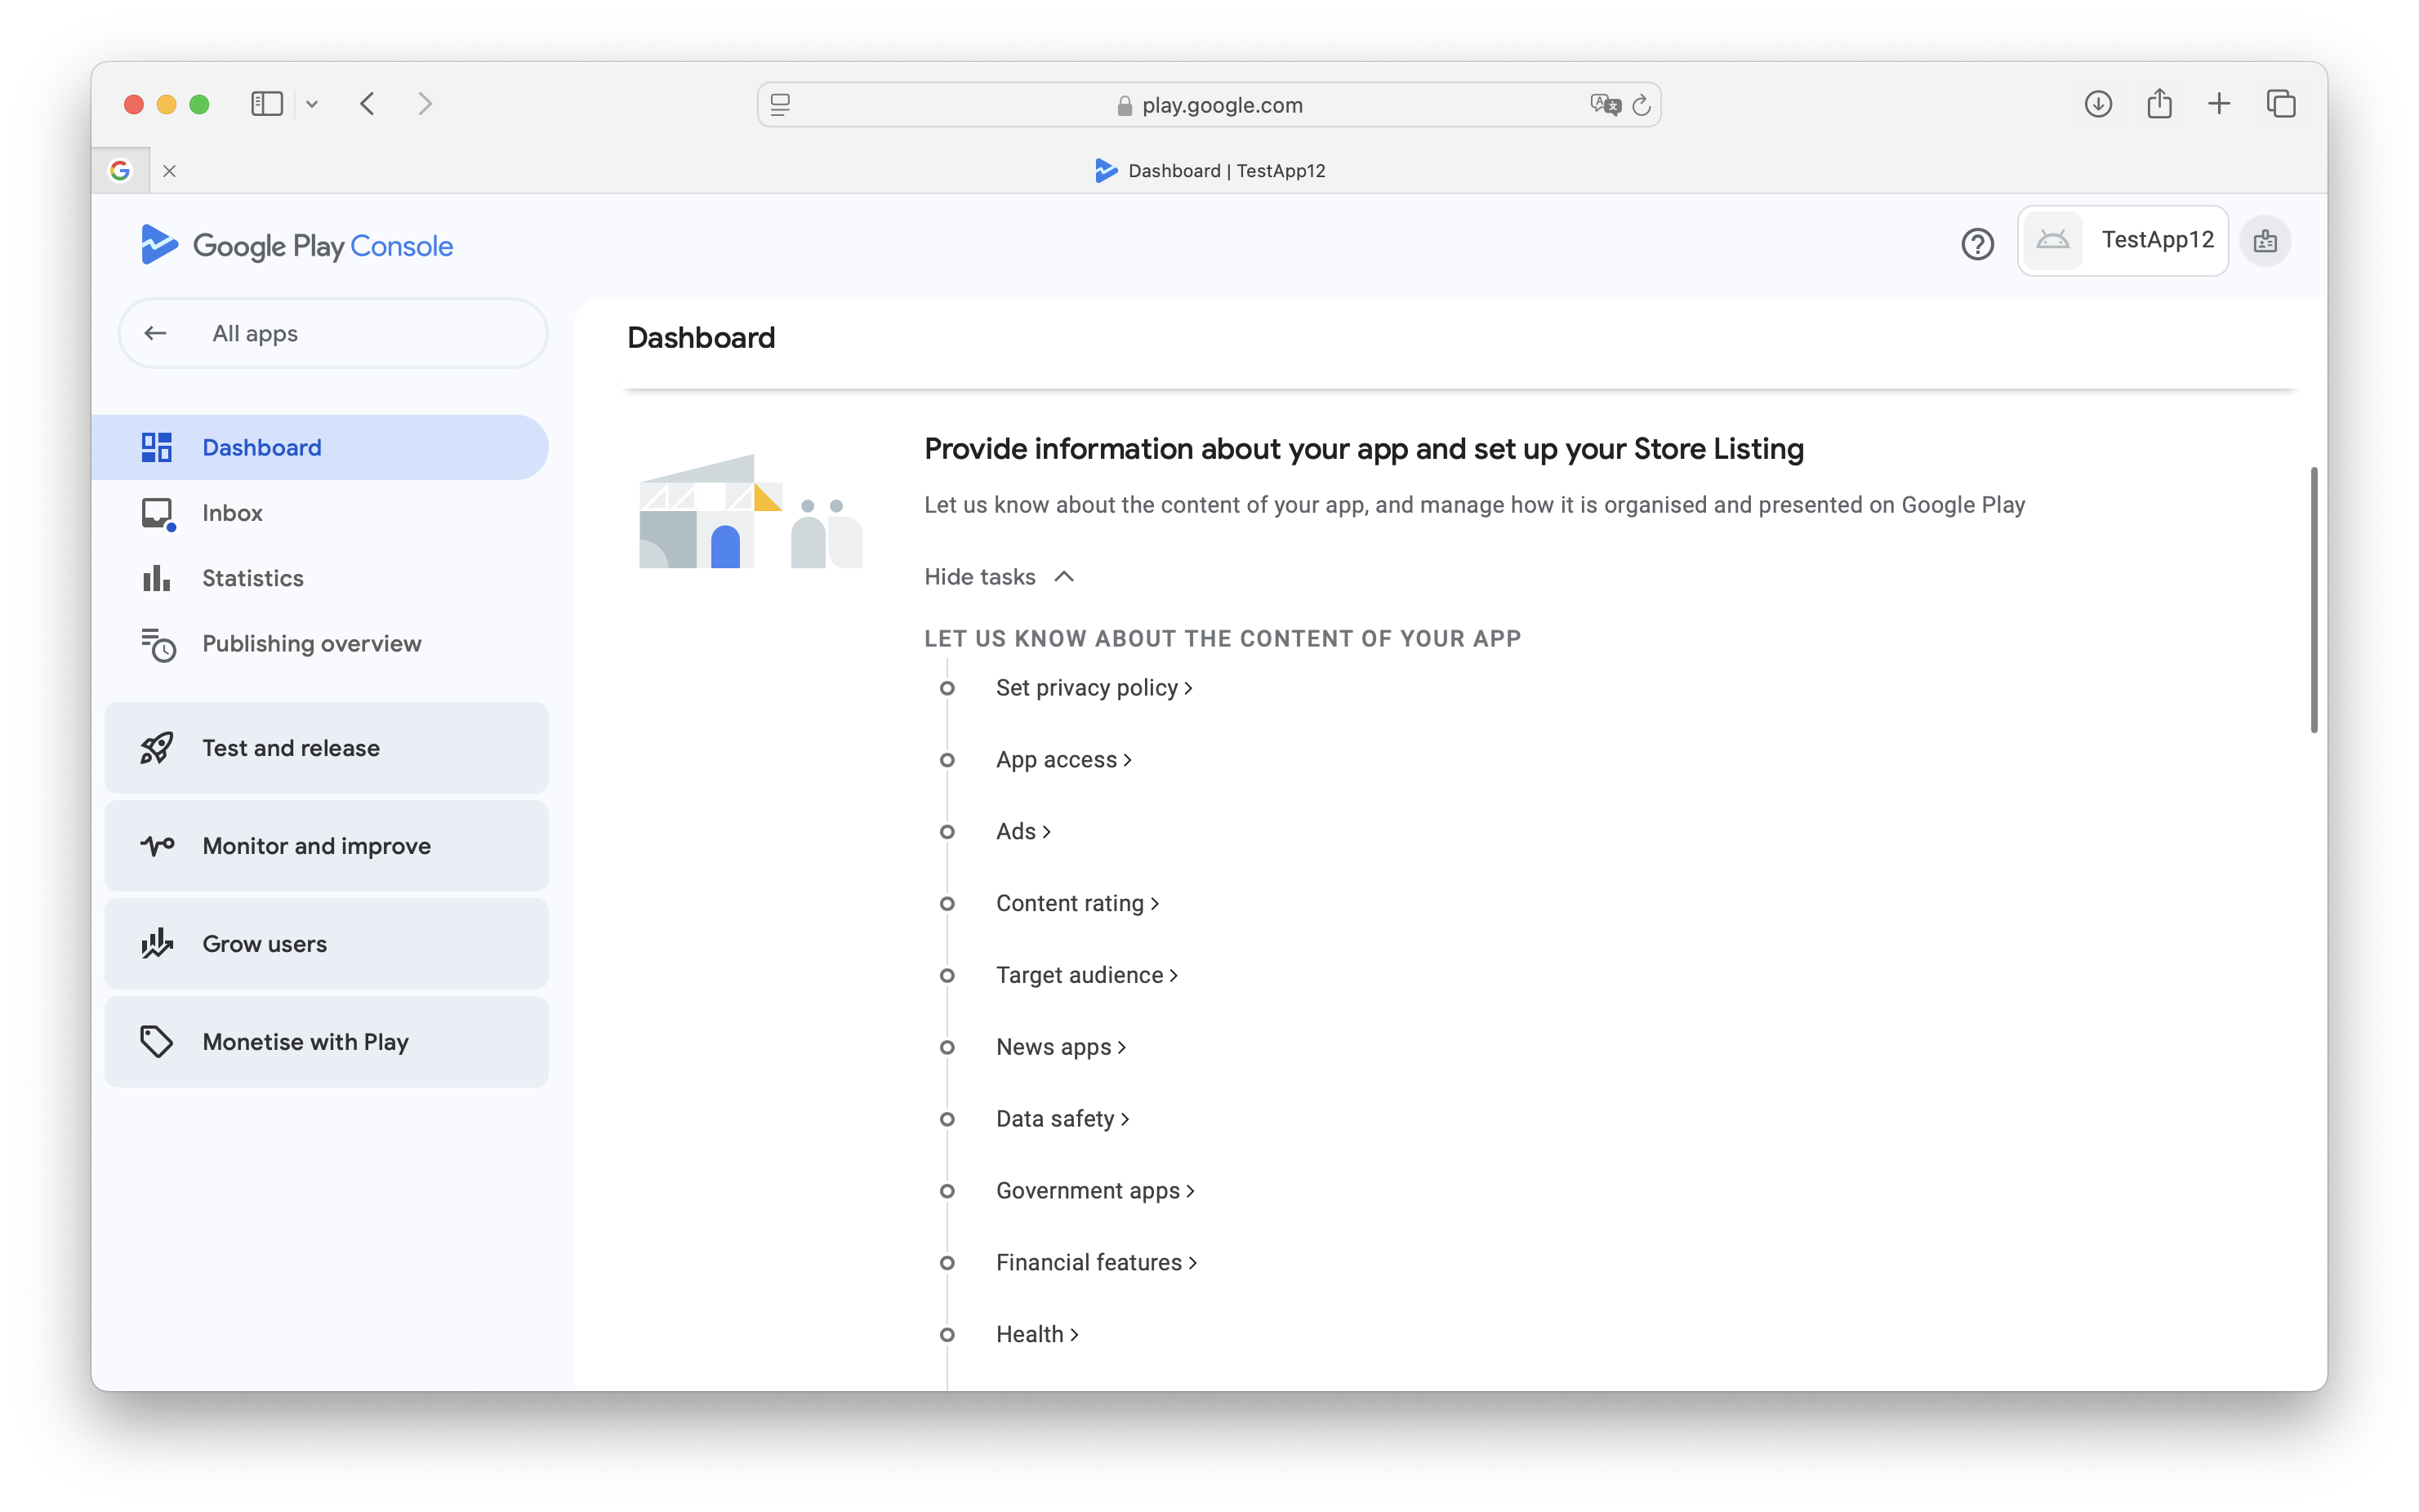
To successfully deploy the app, you must fill in all the app details required by the Google Play Store.
To proceed, navigate to the Set up your app section within the newly created app. Expand the View tasks section. Then, click on each task and fill in the necessary app information.

3. Adding service account credentials
Adding Service Account Credentials to AppMare helps you publish your apps on Google Play.
3.1 Creating a Service Account
To create the Service Account, you can follow the instructions from here. To help you get started quickly, here are the exact steps you need to follow:
- If you haven't set up Firebase in your app, you'll need to create a Google Cloud Project.
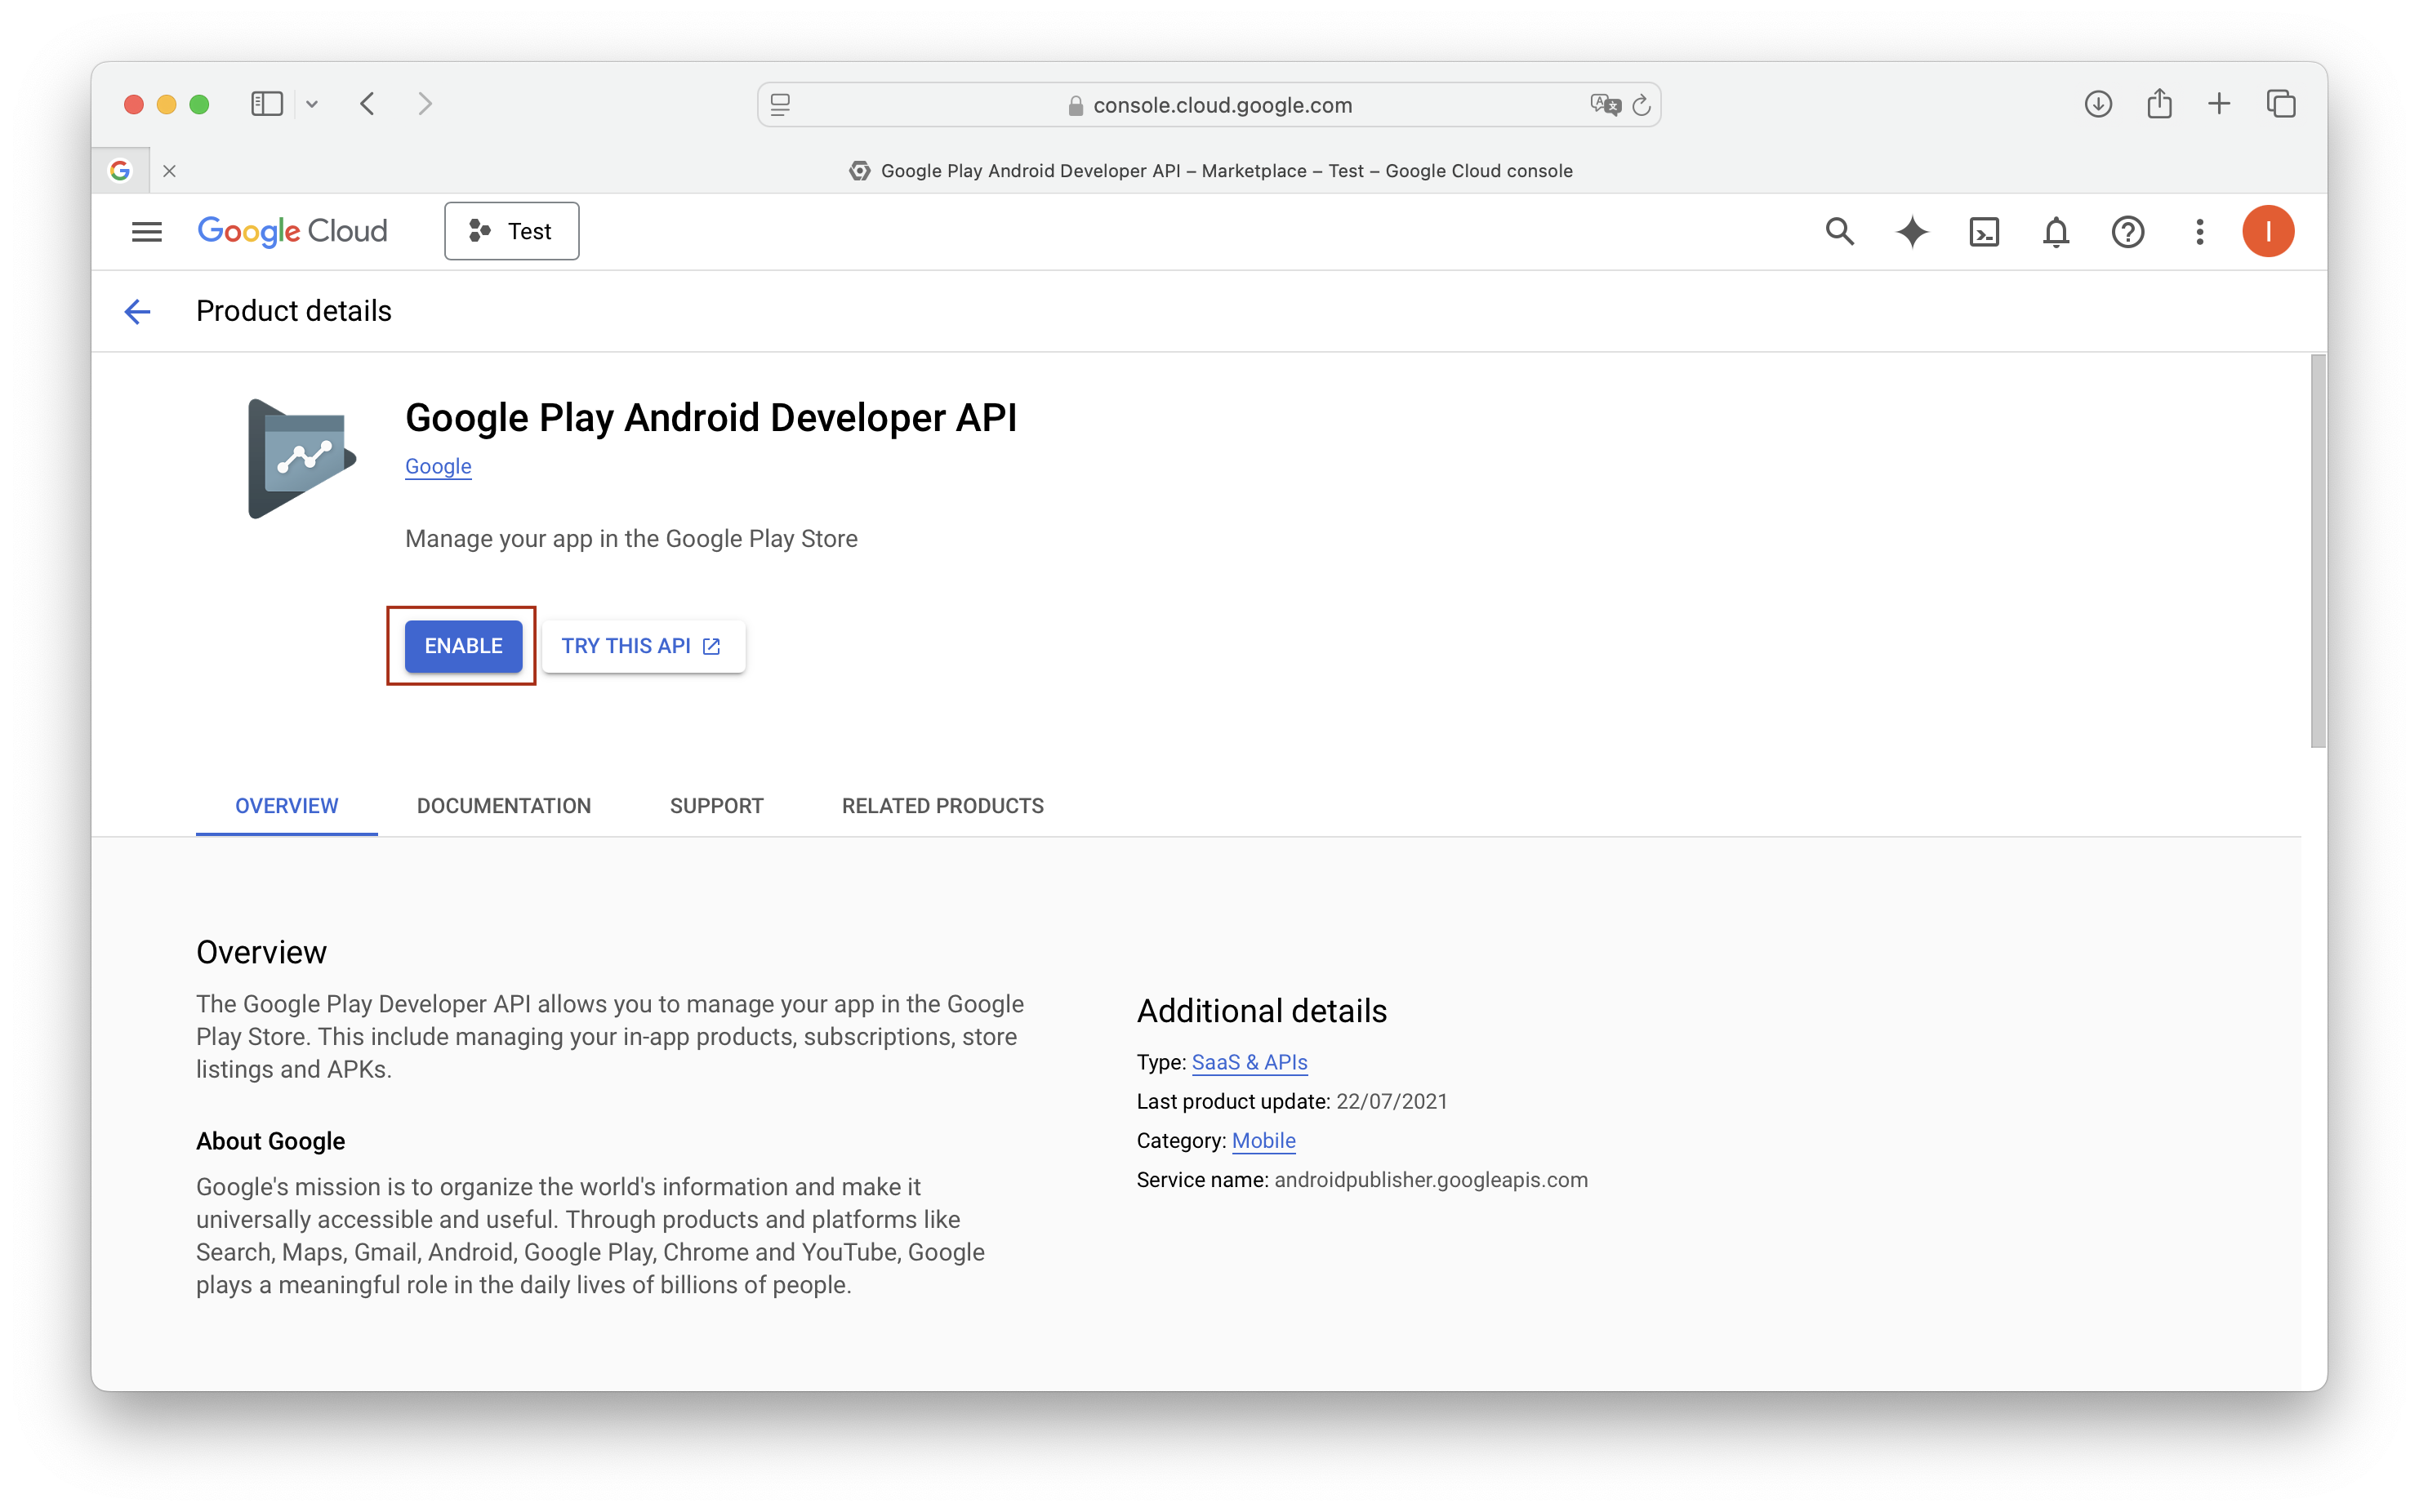
- Then, head over to the Google Play Developer API page in Google Cloud Console and click Enable.

- In Google Cloud Console, go to Service Accounts , click + CREATE SERVICE ACCOUNT, and follow the steps as per in the visual below.
- On the right side of the newly created service account, click the action menu (three dots) icon and select Manage keys. Then, click ADD Key > Create new key > select JSON > CREATE. Keep the downloaded file at a safe place.
- Now, return to the Google Play Console and follow the steps below:
- Go to the Users & Permissions page.
- Click Invite new users.
-
Put the email address for your service account in the email address field and grant the necessary rights to perform actions:
- "Edit and delete draft apps"
- "Release to production..."
- "Release apps to testing tracks"
- style="margin-bottom: 15px;""Manage testing tracks and edit tester lists"
- Click Invite user.
⚠️
For the first publish to the store, you must manually choose the APK & AAB option and upload the AAB file to your desired track in Play Console (only the first time).
Deploy Your App
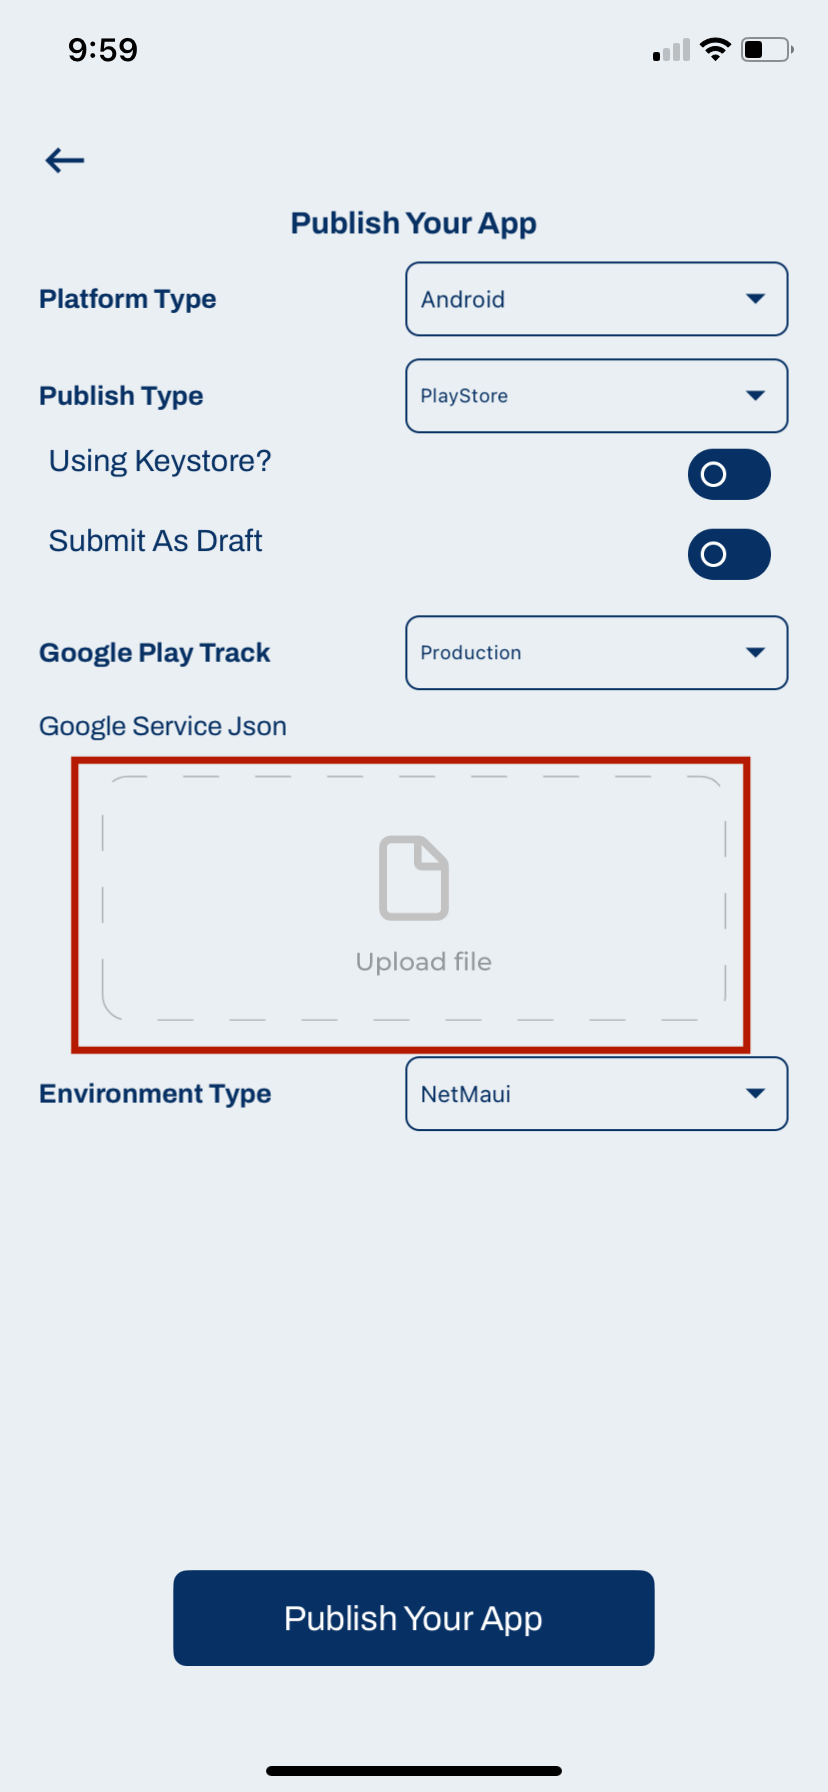
Return to AppMare Press Publish For The App You want To Publish and Upload the google service json that we downloaded

Now Press Publish and Just Wait Till Your App Build And Deployed (It May Take Up To 15 minutes)
Publish to macOS App Store
Content for Publish to macOS App Store section.
Publish as Linux App
Content for Publish as Linux App section.
Export as .NET MAUI Project
Content for Export as .NET MAUI Project section.


